Schoolwork
This section is for work that I completed at school, as a part of my IDD course at BRIT.
 Schoolwork
This section is for work that I completed at school, as a part of my IDD course at BRIT.
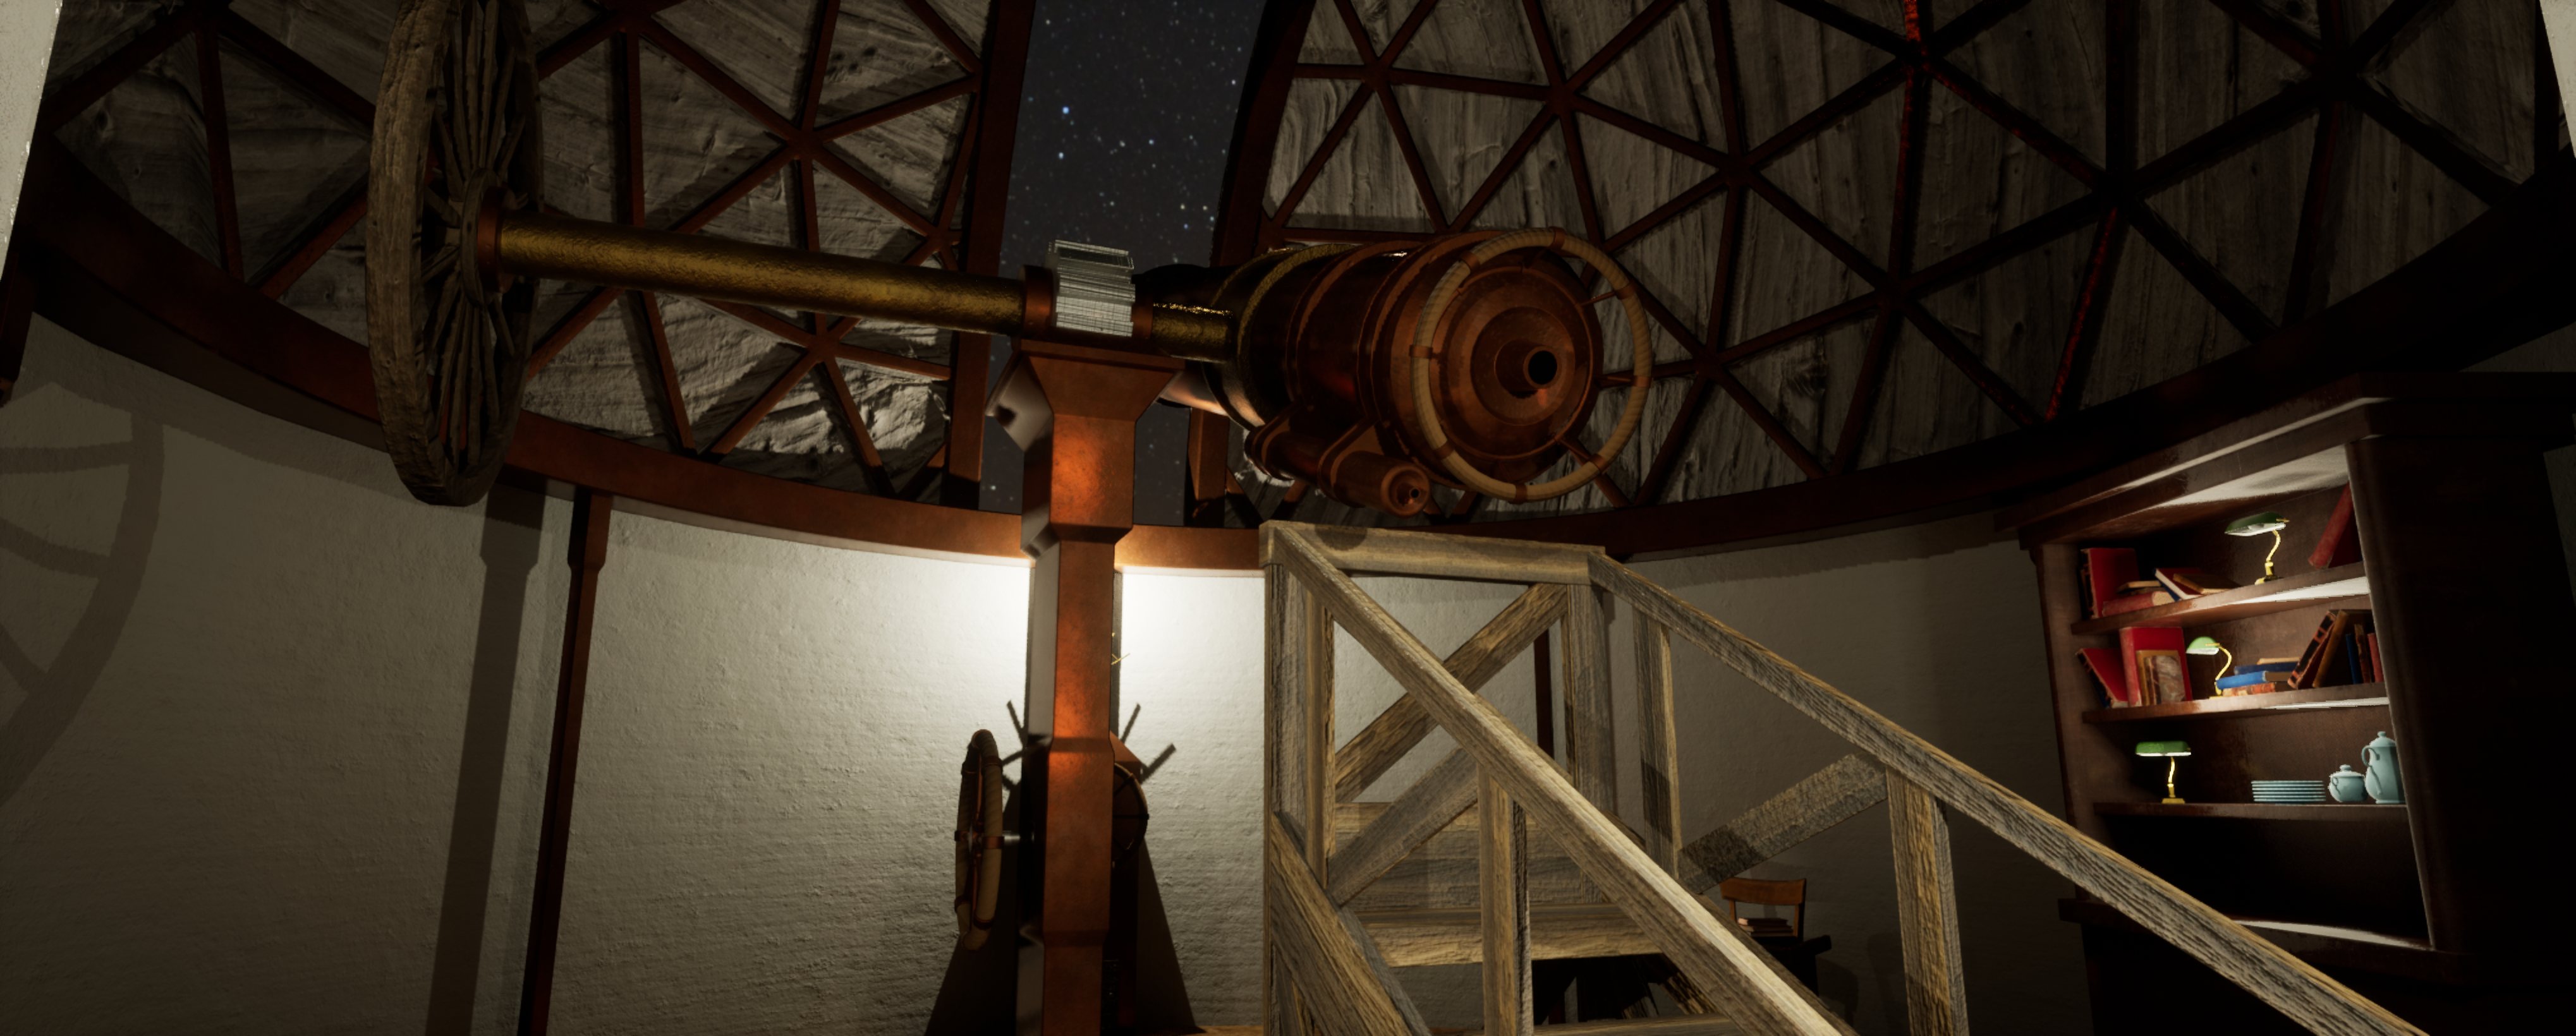
For this project, we were tasked with making a 3D environment in Maya or Blender, and then putting it into the Unreal Engine for rendering. We were allowed to use assets from the internet, but the main focal point of the environment (which for me was the telescope) had to be entirely our own creation. The assets that I got from the internet were the table, the shelf, the books, the crockery, and the lamps. The rest of the room was all my own creation. The environment that I chose to make is an observatory that belongs to a character from the D&D campaign I run (his name is Aster).
This video is the camera animation that I made in the Unreal engine. This environment was the first time I had used the Unreal engine for a project like this. I am very proud of the result, mainly because of the lighting. I usually struggle quite a bit with lighting 3D scenes, as I usually end up making them too dark. However, I feel that the observatory is well lit.

These are a few still renders I made of the observatory scene, to showcase angles of it that were not easily visible in the animation above.
This is my production log, for the observatory scene above. It includes the planning and the production phases, plus the outcomes of a few tutorials that we as a class during that unit.
This is the whitebox I made while planning the observatory scene. As you can see, the layout did change quite a bit, however the most notable thing that changed was my design for the telescope. This is because I rethought the mechanics of how it would work, and made it slightly more modern in its construction compared to the whitebox.
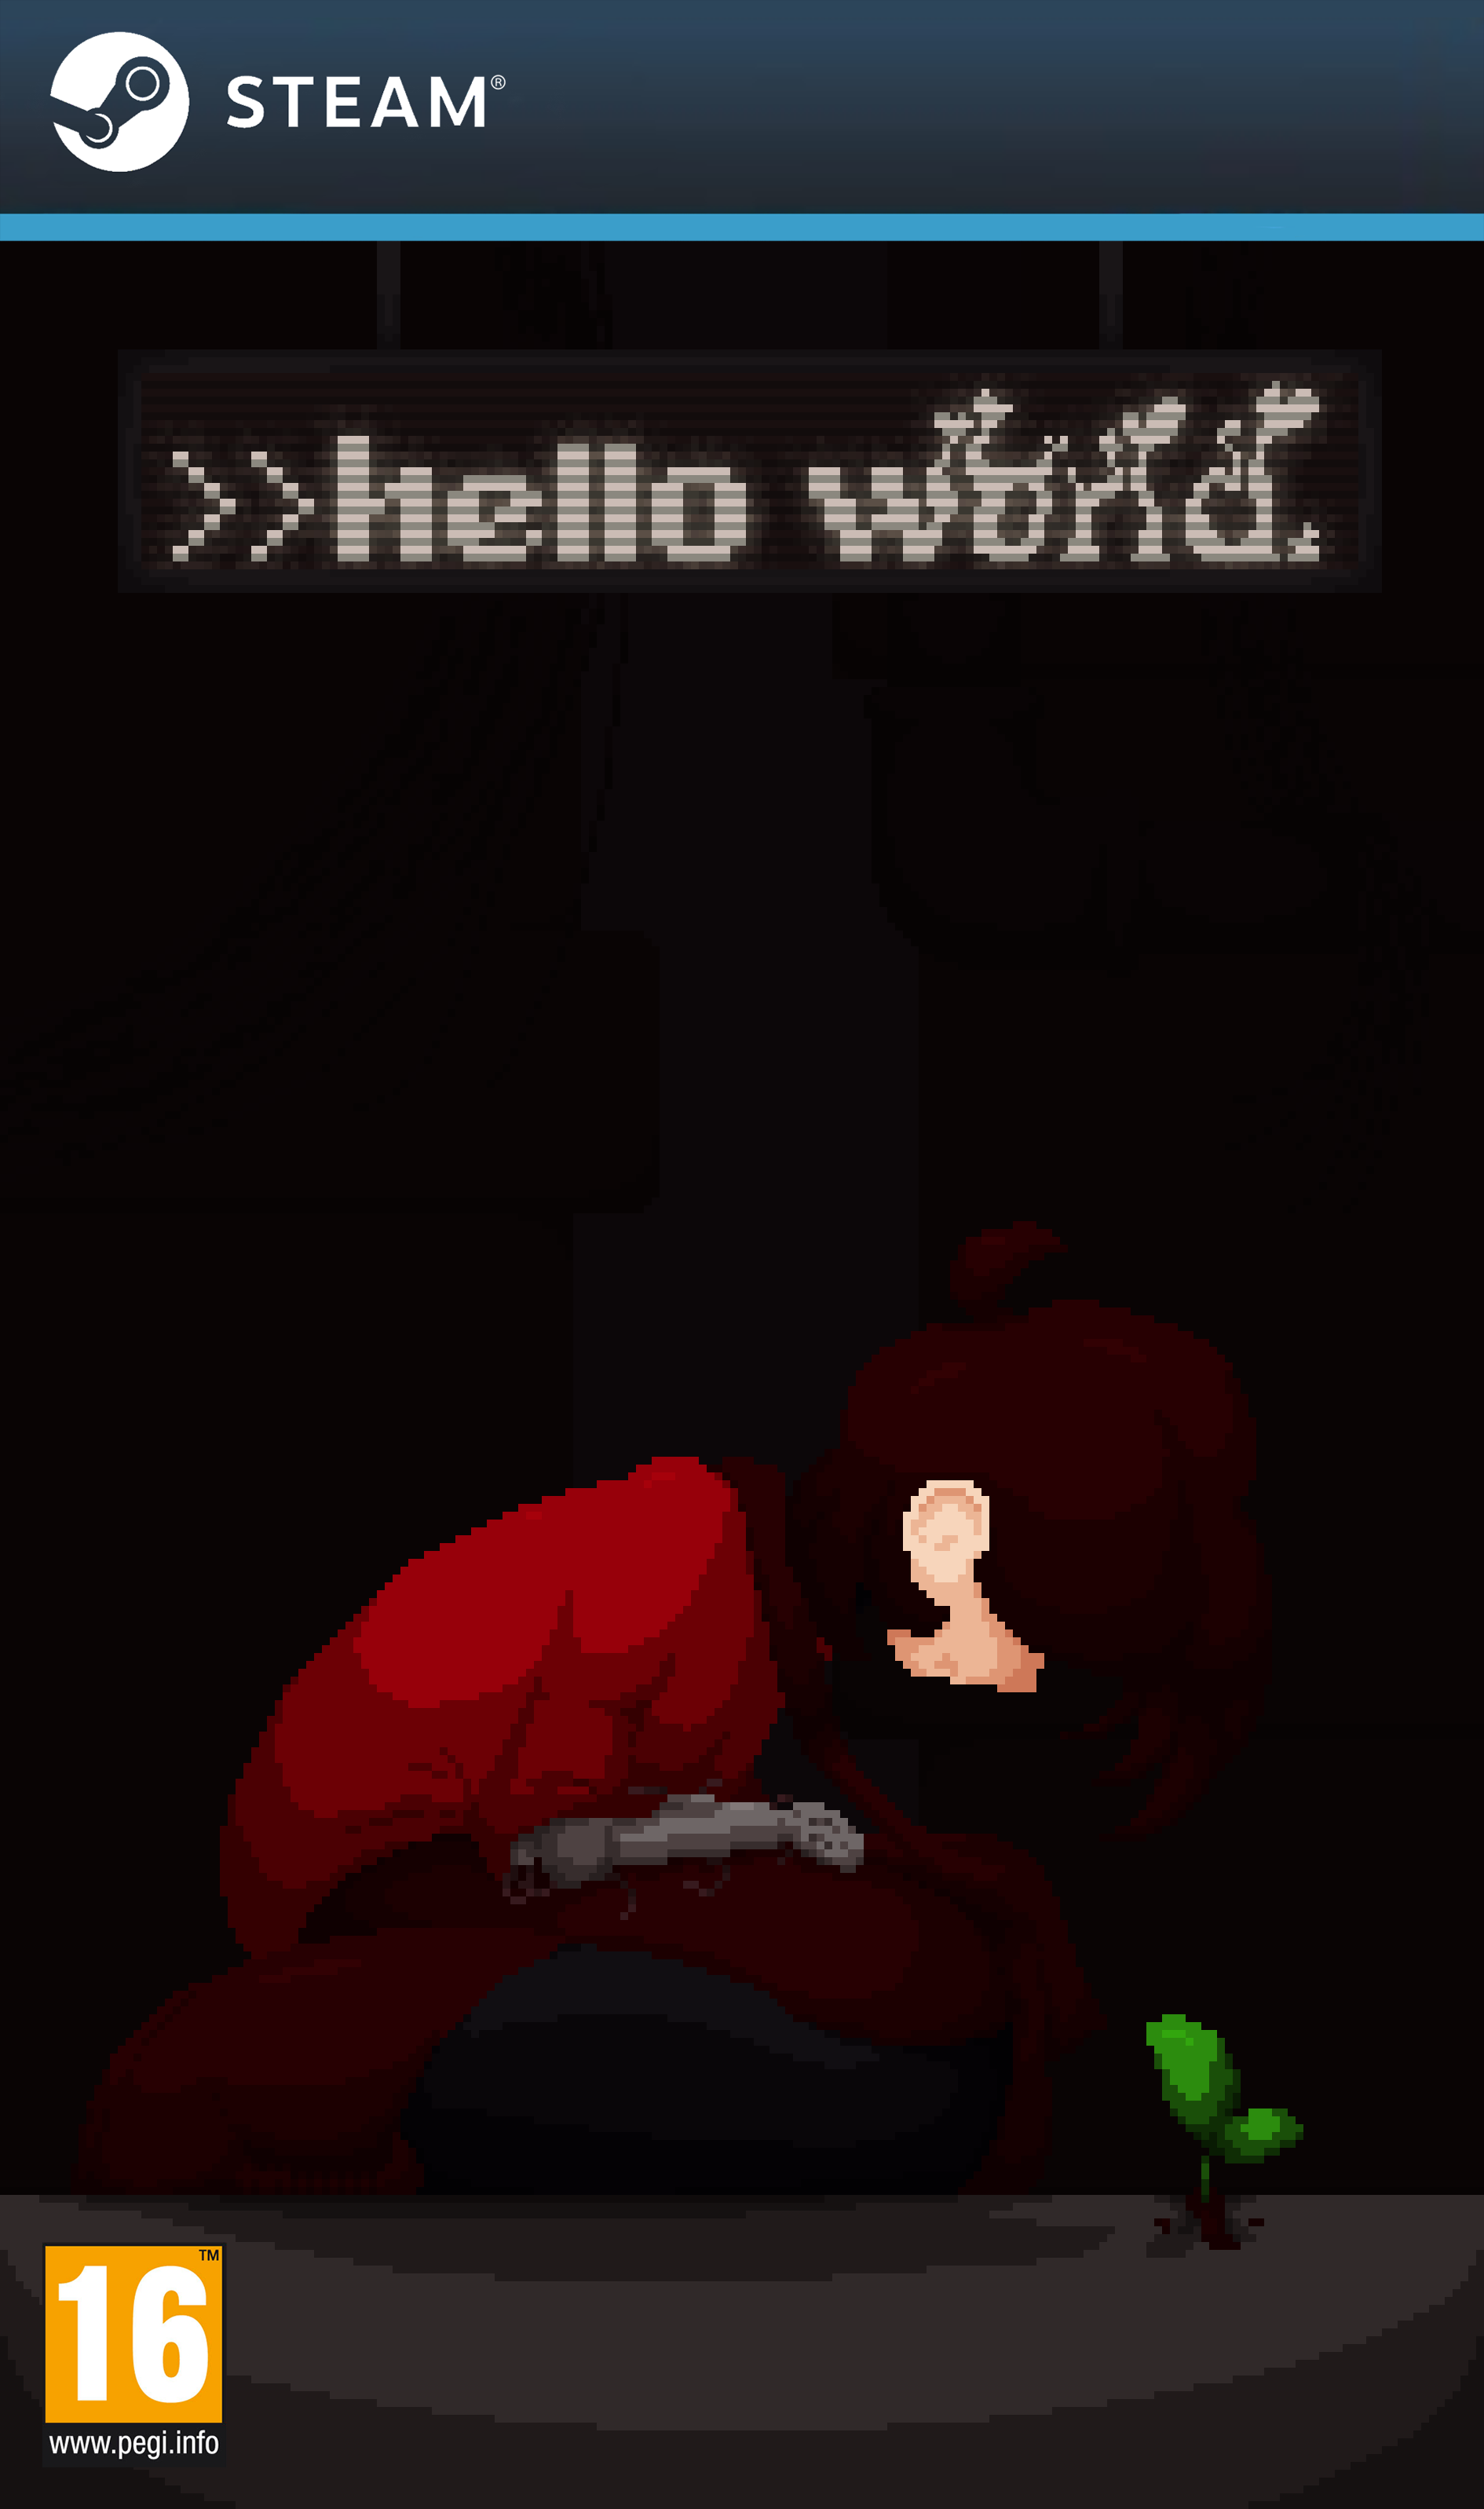
For this project, we were tasked with designing a hypothetical game, including characters and a poster/games cover for it. It was one of the first projects that I did during my time at BRIT (as it was during the first term of year 12). The game that I designed was based off of a game idea/characters that I already had prior to coming to BRIT. The characters in question were the Creator and the Robot, who you can see below. The game is set in the underbelly of a cyberpunk-esuqe city, and it focuses on the Robot and their attempts to bring plant life back to the city. They can use their visibly metal arm to manipulate electricity in a number of ways.
This is the mock games cover I made for my game concept. It shows the robot looking at the plant that kicks off the story. I drew it in a pixel art style, as that is the style of the game at large.
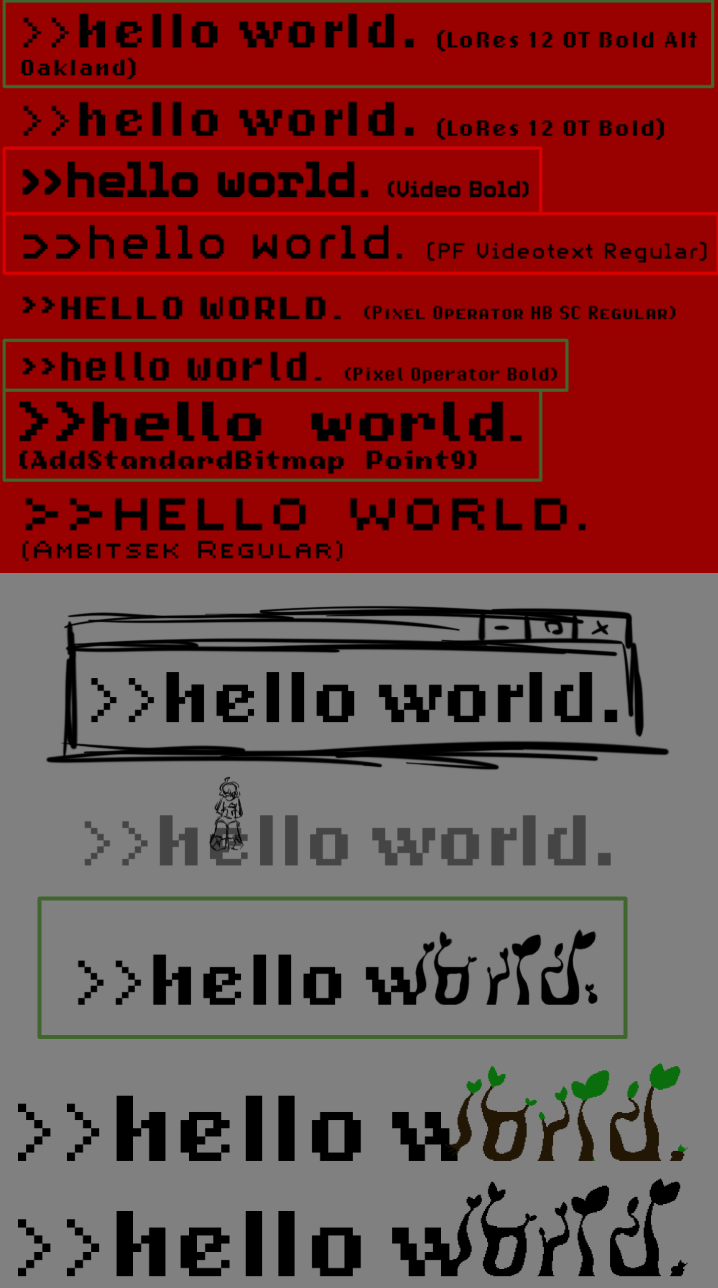
These images show my process for creating the typography. I wanted it to start in a pixel font, but transform into a more flowing font that is shaped like plants, to represent the Robot's aim of growing more plants in the city. To do this, I typed out the phrase ">>hello world" in my chosen font, and then drew over the word "world" with the flowing, plant-like shapes. Initially, the plant shapes were at a higher resolution than the pixel font, but when I put the title on the final games cover, I changed it so that they were at the same resolution. I am very proud of the outcome of the typography, as I believe it is both visually pleasing and thematically appropriate.
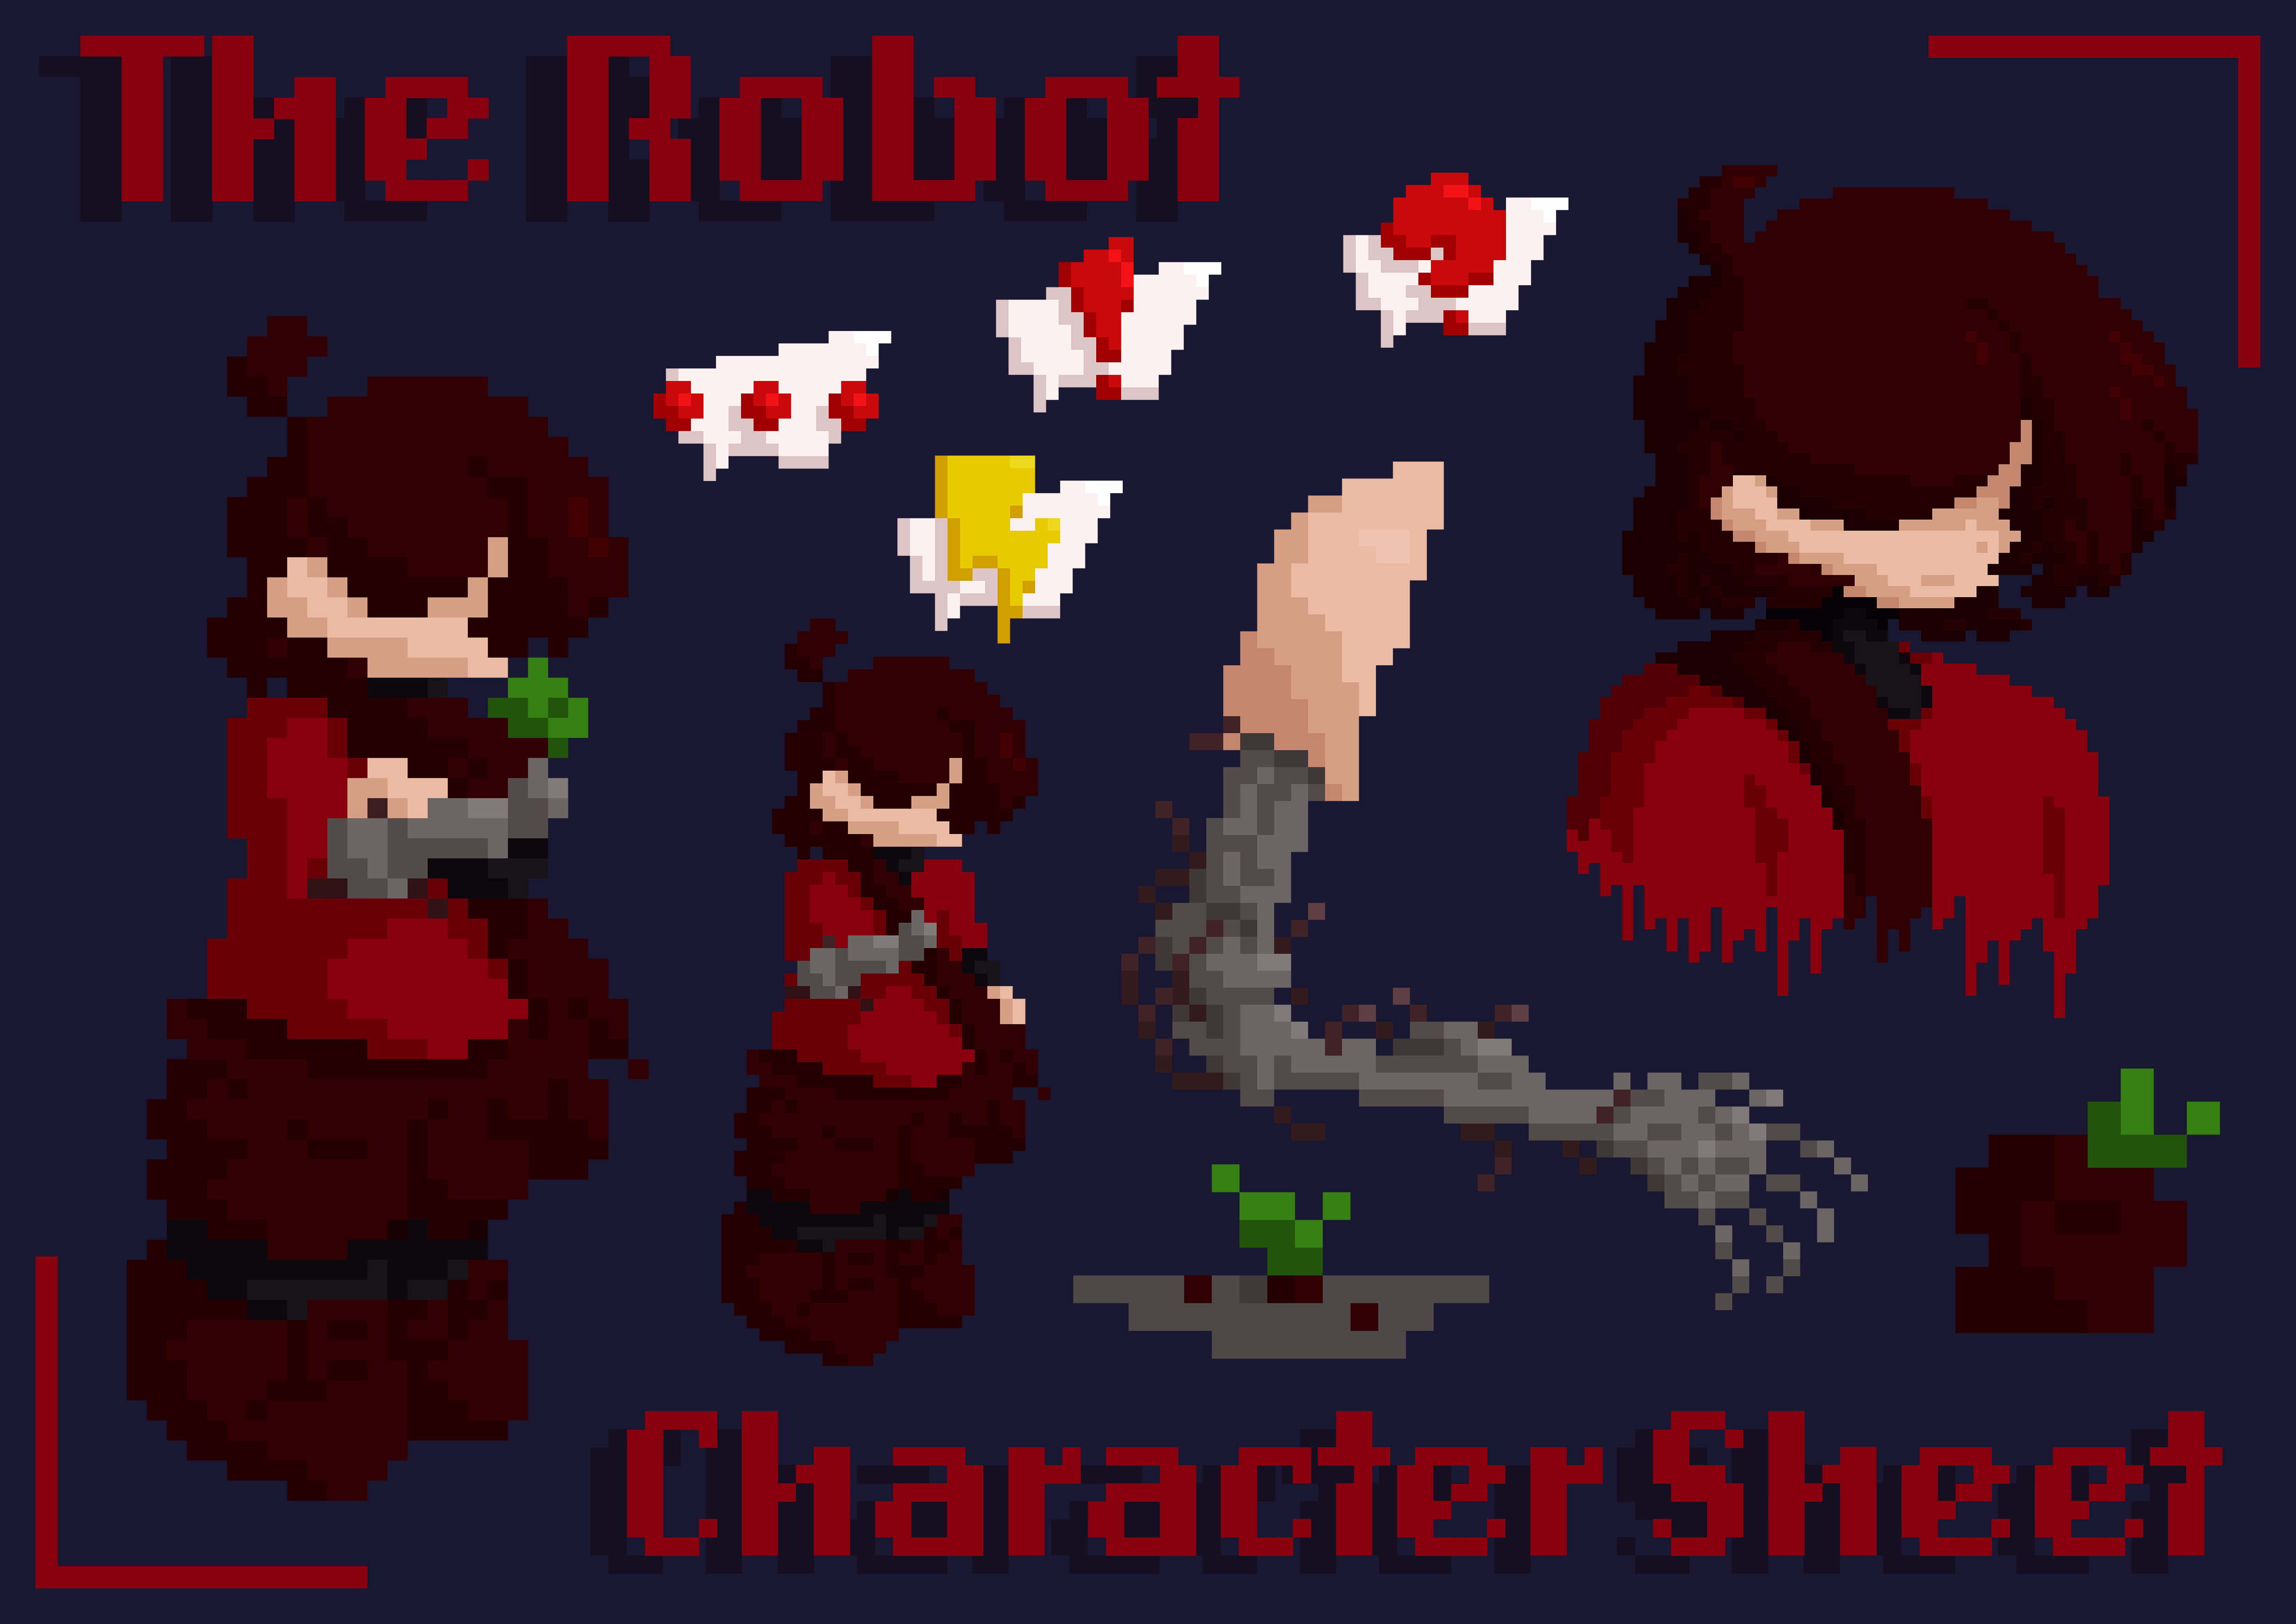
This is the design for the Robot that I had in year 12 (you can see its new design here). This character sheet contains a variety of different assets for them, including their sprite (both holding the plant and without it), little speech bubbles to show their emotions, a character portrait, a drawing of their metal arm, and two drawings of the plant. I am particularly proud of the drawing of their metal arm, as I think it gets the shape and complexity of it across very well.
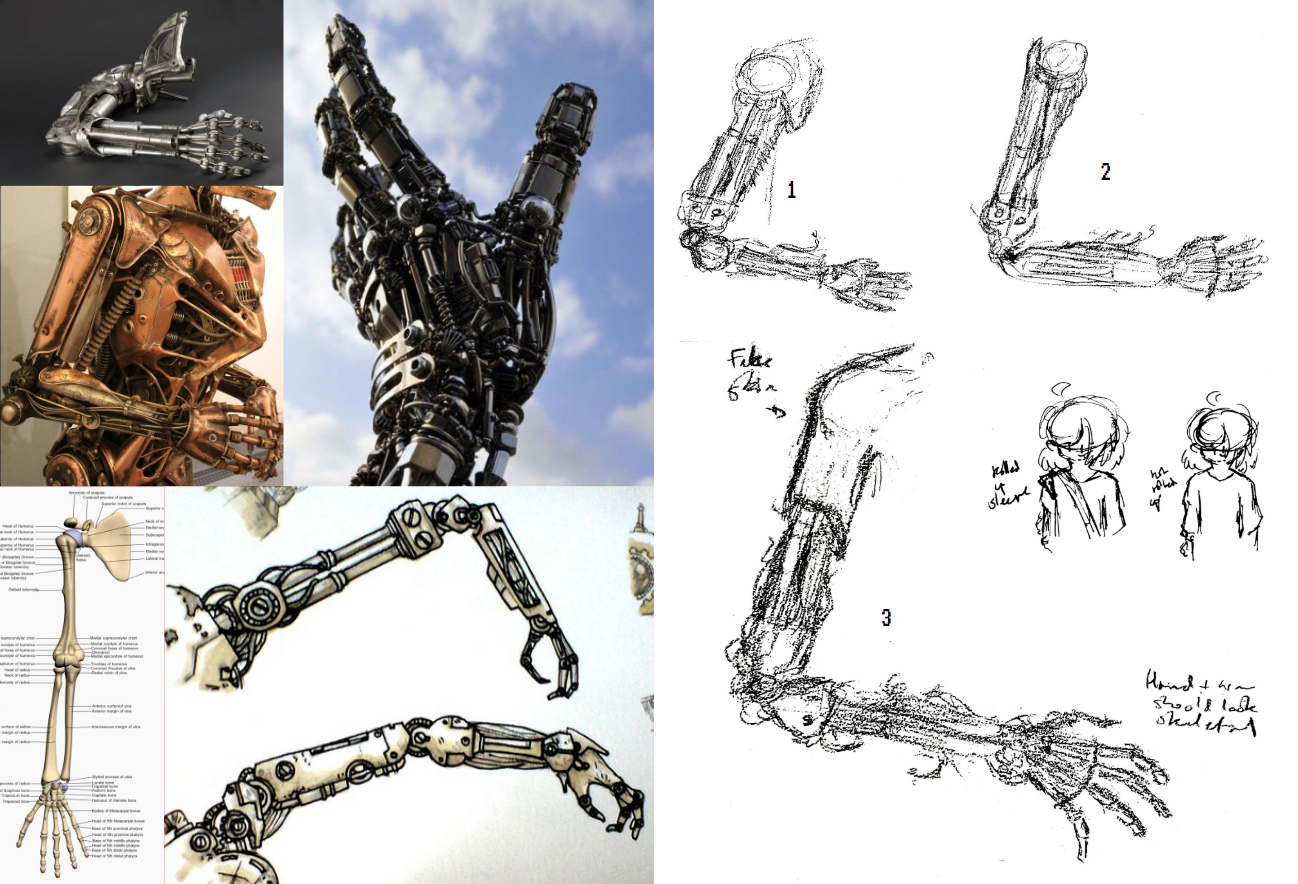
This shows my moodboard and my sketches for when I was designing the Robot's metal arm. I drew the sketches on paper and then scanned them to get them in digital form, which also gave the images a pleasing scratchiness. The drawing that I ended up turning into pixel art (which you can see above) was the 3rd sketch.
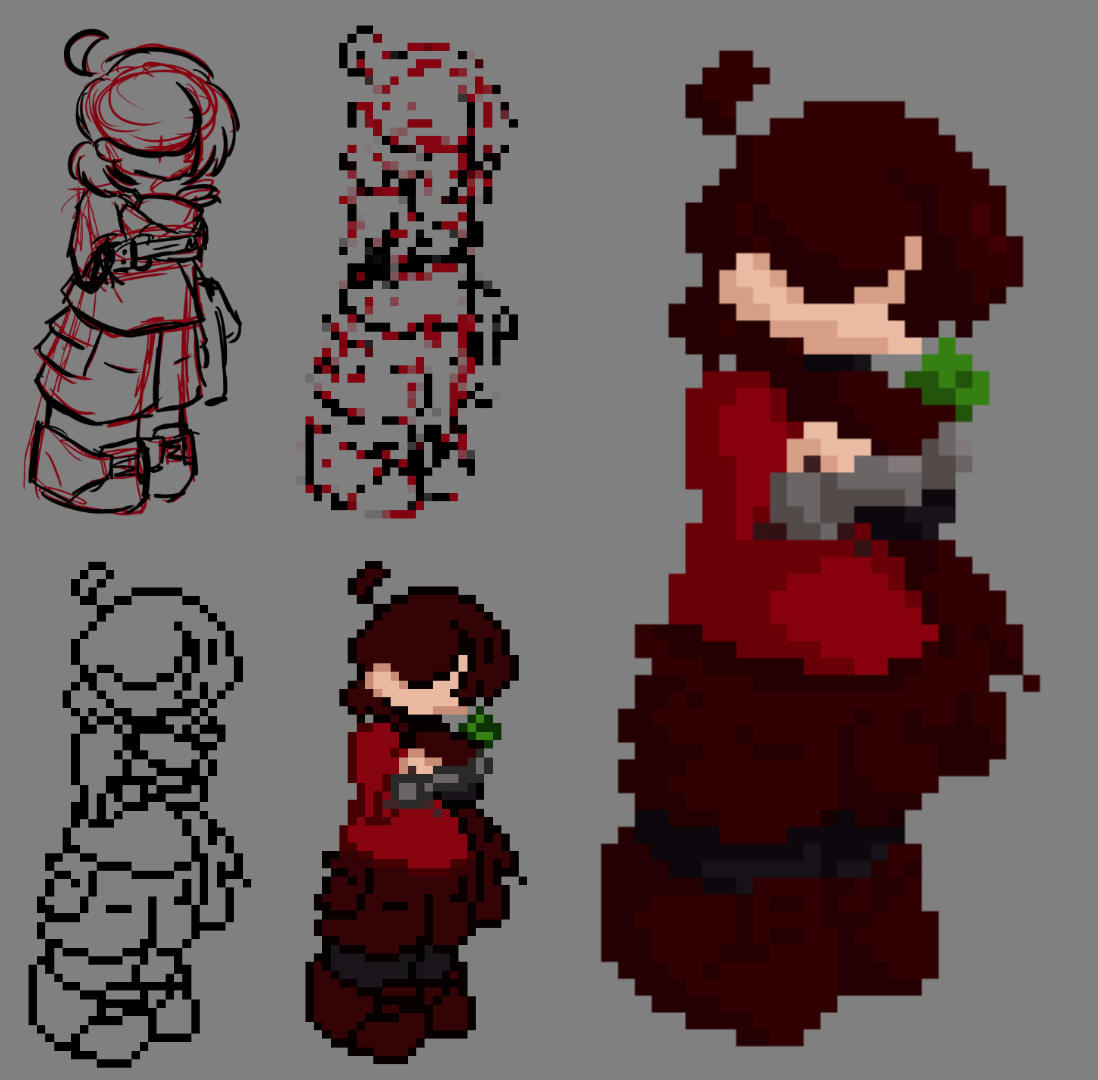
This shows my process for drawing the robot's sprite. To start with, I drew a sketch of at a larger canvas size of how I wanted it to look like. I then shrunk it down to a much smaller size (using the nearest neighbour scaling setting) and then traced over the sketch with a 1 pixel big brush. Next, I filled the different areas of the sprite with the right colours, making sure to keep the colour count as small as possible, to keep it coherent. I then added shading, using a multiply layer.
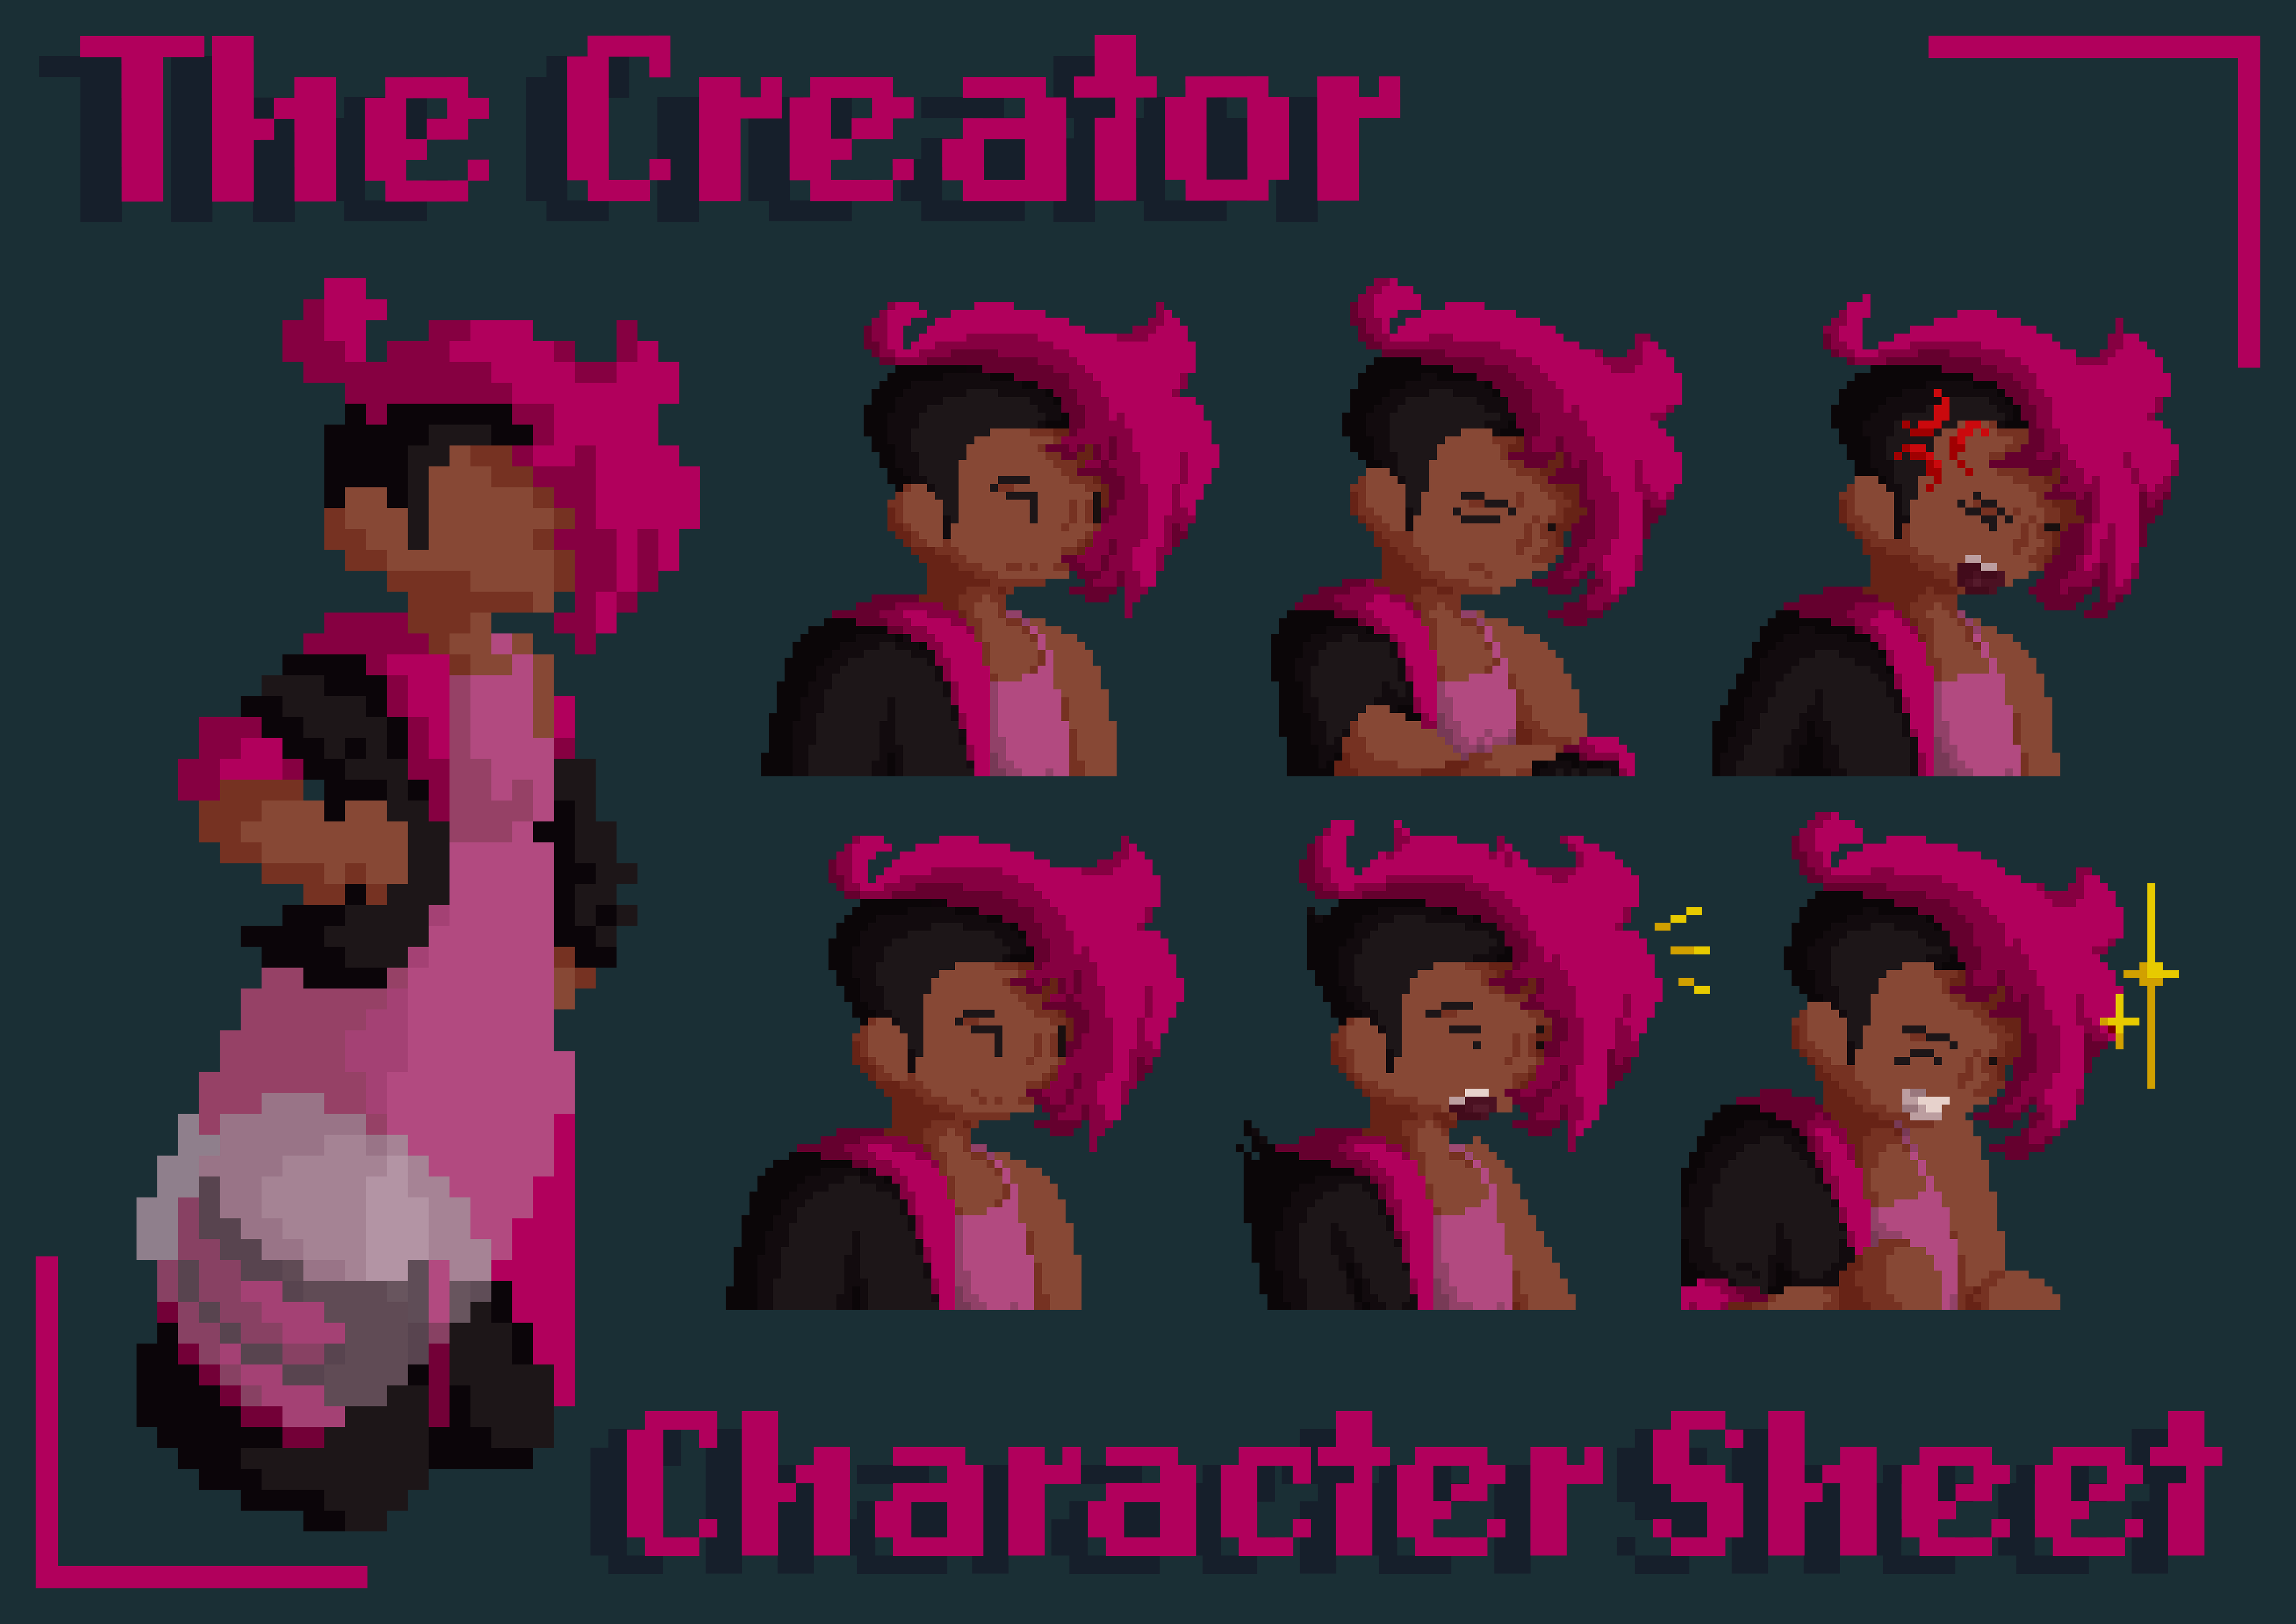
This is the design for the Creator that I had in year 12 (you can see her new design here). I mainly used her character sheet to showcase different emotions/facial expressions for her. I really like her sprite (on the left) however, I do think her facial expressions could be improved. One part of it is the shading, as I feel like it looks a little strange, especially on her hair.
The reason why both of the sprites are lacking in a face is because the sprites are too small for the face to be clearly visible, in a way that looks nice. It is a deliberate stylistic choice.
This was my year 12 CMP, ie, my end of year project in year 12. For the brief, we could choose from a few different pre-set briefs, including some past ArtStation Challenges. The brief that I chose was the Neo Tokyo: Exponential Reality Game Environment/Level Art brief, as this was something I though would be interesting to make for me. Because we had not learnt how to use the Unreal engine at this point, the environment did not have to be rendered in real time (I used the Arnold renderer in Maya, as I modelled my environment in Maya). The environment that I made was a room for the Creator, who you can see above. This room is also partially the reason why I redesigned her, as I felt her old design did not fit the design of the room.
The software that I used were Maya for modelling and rendering, and Substance Painter for texturing. I also put the room on Sketchfab, as you can see above, so it can be viewed in 3D. You can see more about my y12 CMP here
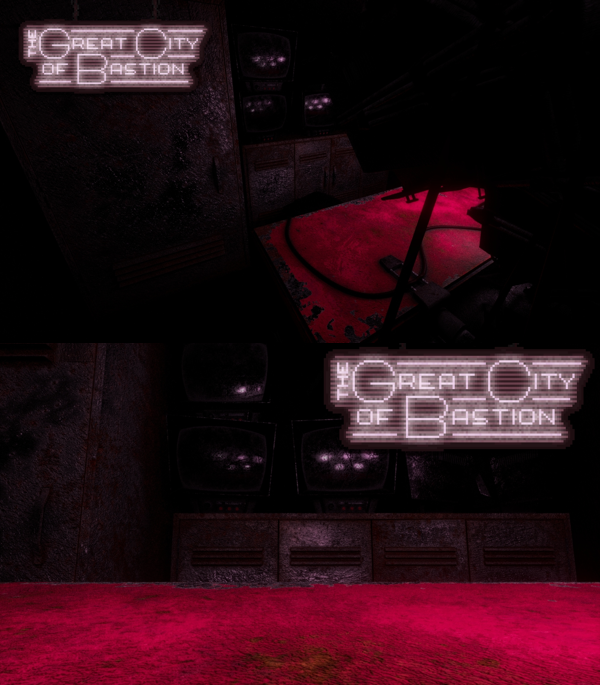
These are the posters I made for the game my environment would have been a part of. It is the same game that I was designing as a part of my year 12 game design unit (see above), but I changed the name from ">>hello world" to "the Great City of Bastion" (as the city that the game is set in is called Bastion). My favourite poster out of these is the one on the top. I made the logo in a similar way to how I made the logo for my year 12 game design unit.
This is a very abridged version of my planning process/production log (you can see the unabridged versions on the website I made for my year 12 CMP). The first slide shows my moodboards that I used as reference for the colours, the lighting, the layout and the assets. The second slide shows snapshots of my modelling/texturing process in Maya and Substance Painter. The last slide shows bits of my lighting and rendering process, and the process of making the logo for the posters.
These are the whiteboxes that I made when planning my environment. I went through quite a few iterations before I settled on one I liked. They are in the order that I made them (with the first one first and the most recent one last). The pink boxes are cabinets, the green boxes are TVs, the blue boxes are beds and/or tables, and the yellow cylinder is the fan.